Tutorial
Executing a binary file without typing the full path in Linux (Ubuntu)
Last week, I was trying to run a program for the analysis of lipid surface area in protein-membrane systems called VTMC. Unfortunately, I had a hard time to run the program since I had to use the terminal to go to that bin folder where the program exists and had to execute the program by typing ./vtmc.ubu.ifc Then, I somehow managed to learn a new technique to run the program without typing the full path in the terminal again and again which I would like to share in this blog post. There are two easy techniques which I can suggest, though there are many more which you guys can comment below. The first one is by creating a symbolic link of the program or the file at
/usr/local/bin/
For creating the symbolic link we shall type in the terminal:
sudo ln -s /full_path_of_your_file /usr/local/bin/name_of_new_command
Then, we will make the file executable by typing:
chmod +x /full/path/to/your/file
Now, we will be able to run the program any time by typing name_of_new_command in the terminal. The another method is by editing the .bashrc file to add the directory where the program is located.
- Type gedit (or any other text editors) .bashrc in terminal
- Add at the end of the .bashrc file
export PATH="directory of the program":$PATH - Save the file and quit gedit
- Now, type
source .bashrcin terminal You shall be able to run the program now easily by typing the file’s name in the terminal. In my case, it was vtmc.ubu.ifc
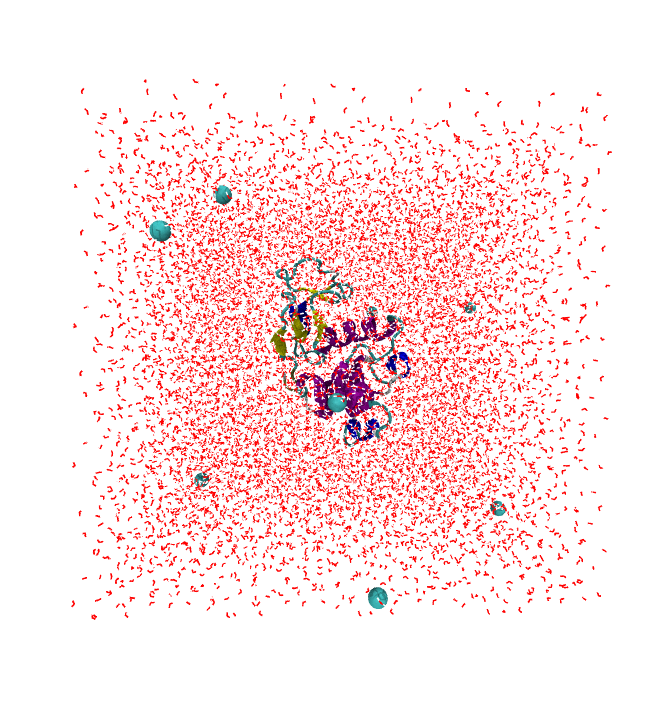
TCL Script to Visualize Protein in a water box
Despite being a huge fan of VMD, I’ve never liked the default visualisation settings in VMD. Though we can change it in VMD Configuration file (.vmdrc), here I have written a simple TCL script to visualize simple system like Protein in a water box. The typical example for such system can be downloaded from here.
TCL Script
##### read structure and coordinates
mol load gro 1aki_solv_ions.gro


#### delete initial line representation for everything
mol delrep 0 top

#### make VDW representation for ions
mol selection {ions}
mol color Name
mol representation VDW
mol material Opaque
mol addrep top

#### make Cartoon representation for protein
mol selection {protein}
mol color Structure
mol representation NewCartoon
mol material Opaque
mol addrep top

#### make line representation for water
mol selection {water}
mol color Name
mol representation Lines
mol material Opaque
mol addrep top

#### turn off axes
axes location off

### set background white
color Display Background 8
Run the above script from Extensions—–>TK Console in VMD.
source script.tcl
You can also download the above script from here.
Installation of VMD and NAMD in Ubuntu

While Nanoscale Molecular Dynamics (NAMD) is a computer software for molecular dynamics simulation, Visual molecular dynamics (VMD) is a molecular modelling and visualization computer program. Though these programs are easy to install, installing these programs can be a pain in arse for the ones who are new to Linux(Ubuntu). Here, I will give you the simplest method to install these programs.
NAMD
- First of all download the latest version of NAMD for your system. Since I use 64 bit Ubuntu, I will download the latest NAMD version from
- Then extract the contents of the folder in your current directory, in my case NAMD_CVS-2017-03-30_Linux-x86_64-multicore.tar.gz by using this command in terminal
$ tar -zxvf NAMD_CVS-2017-03-30_Linux-x86_64-multicore.tar.gz - Now change directory to the extracted folder for NAMD by using this command in terminal
$ cd NAMD_CVS-2017-03-30_Linux-x86_64-multicore - Finally, in terminal, type
$ sudo cp namd2 /usr/local/binIn this way you can install NAMD in Ubuntu (LINUX)
VMD
- Download the latest 64 bit version of VMD for LINUX from
- Extract the contents of the folder in your current directory, in my case vmd-1.9.2.bin.LINUXAMD64-RHEL5.opengl.tar.gz by using this command in terminal
$ tar -zxvf vmd-1.9.2.bin.LINUXAMD64-RHEL5.opengl.tar.gz - Now change directory to the extracted folder for VMD by using this command in terminal
$ cd vmd-1.9.2 - Then type
$ ./configure LINUXAMD64 - Change the directory to /src using
$ cd src - Finally, type
$ sudo make install